
PART TWO: How to make a great photo!
Now, that we’re past the technical (yet incredibly useful) tricks, let’s get down to the good stuff, the perfectly orange juicy mango part: the photo MAKING process. FACT: using these fundamentals, you can improve your photography 1000 fold in 2.7 seconds.
Also, what’s so interesting about making photos is that everyone has different perspectives and moments that they are drawn to. While I’m drawn to happy, loud, goofy, and emotional moments, other people may be drawn to more quiet or scenic moments. We each have our own personal vision and story to tell. Using composition, perspective and lighting is how we tell it.
Composition
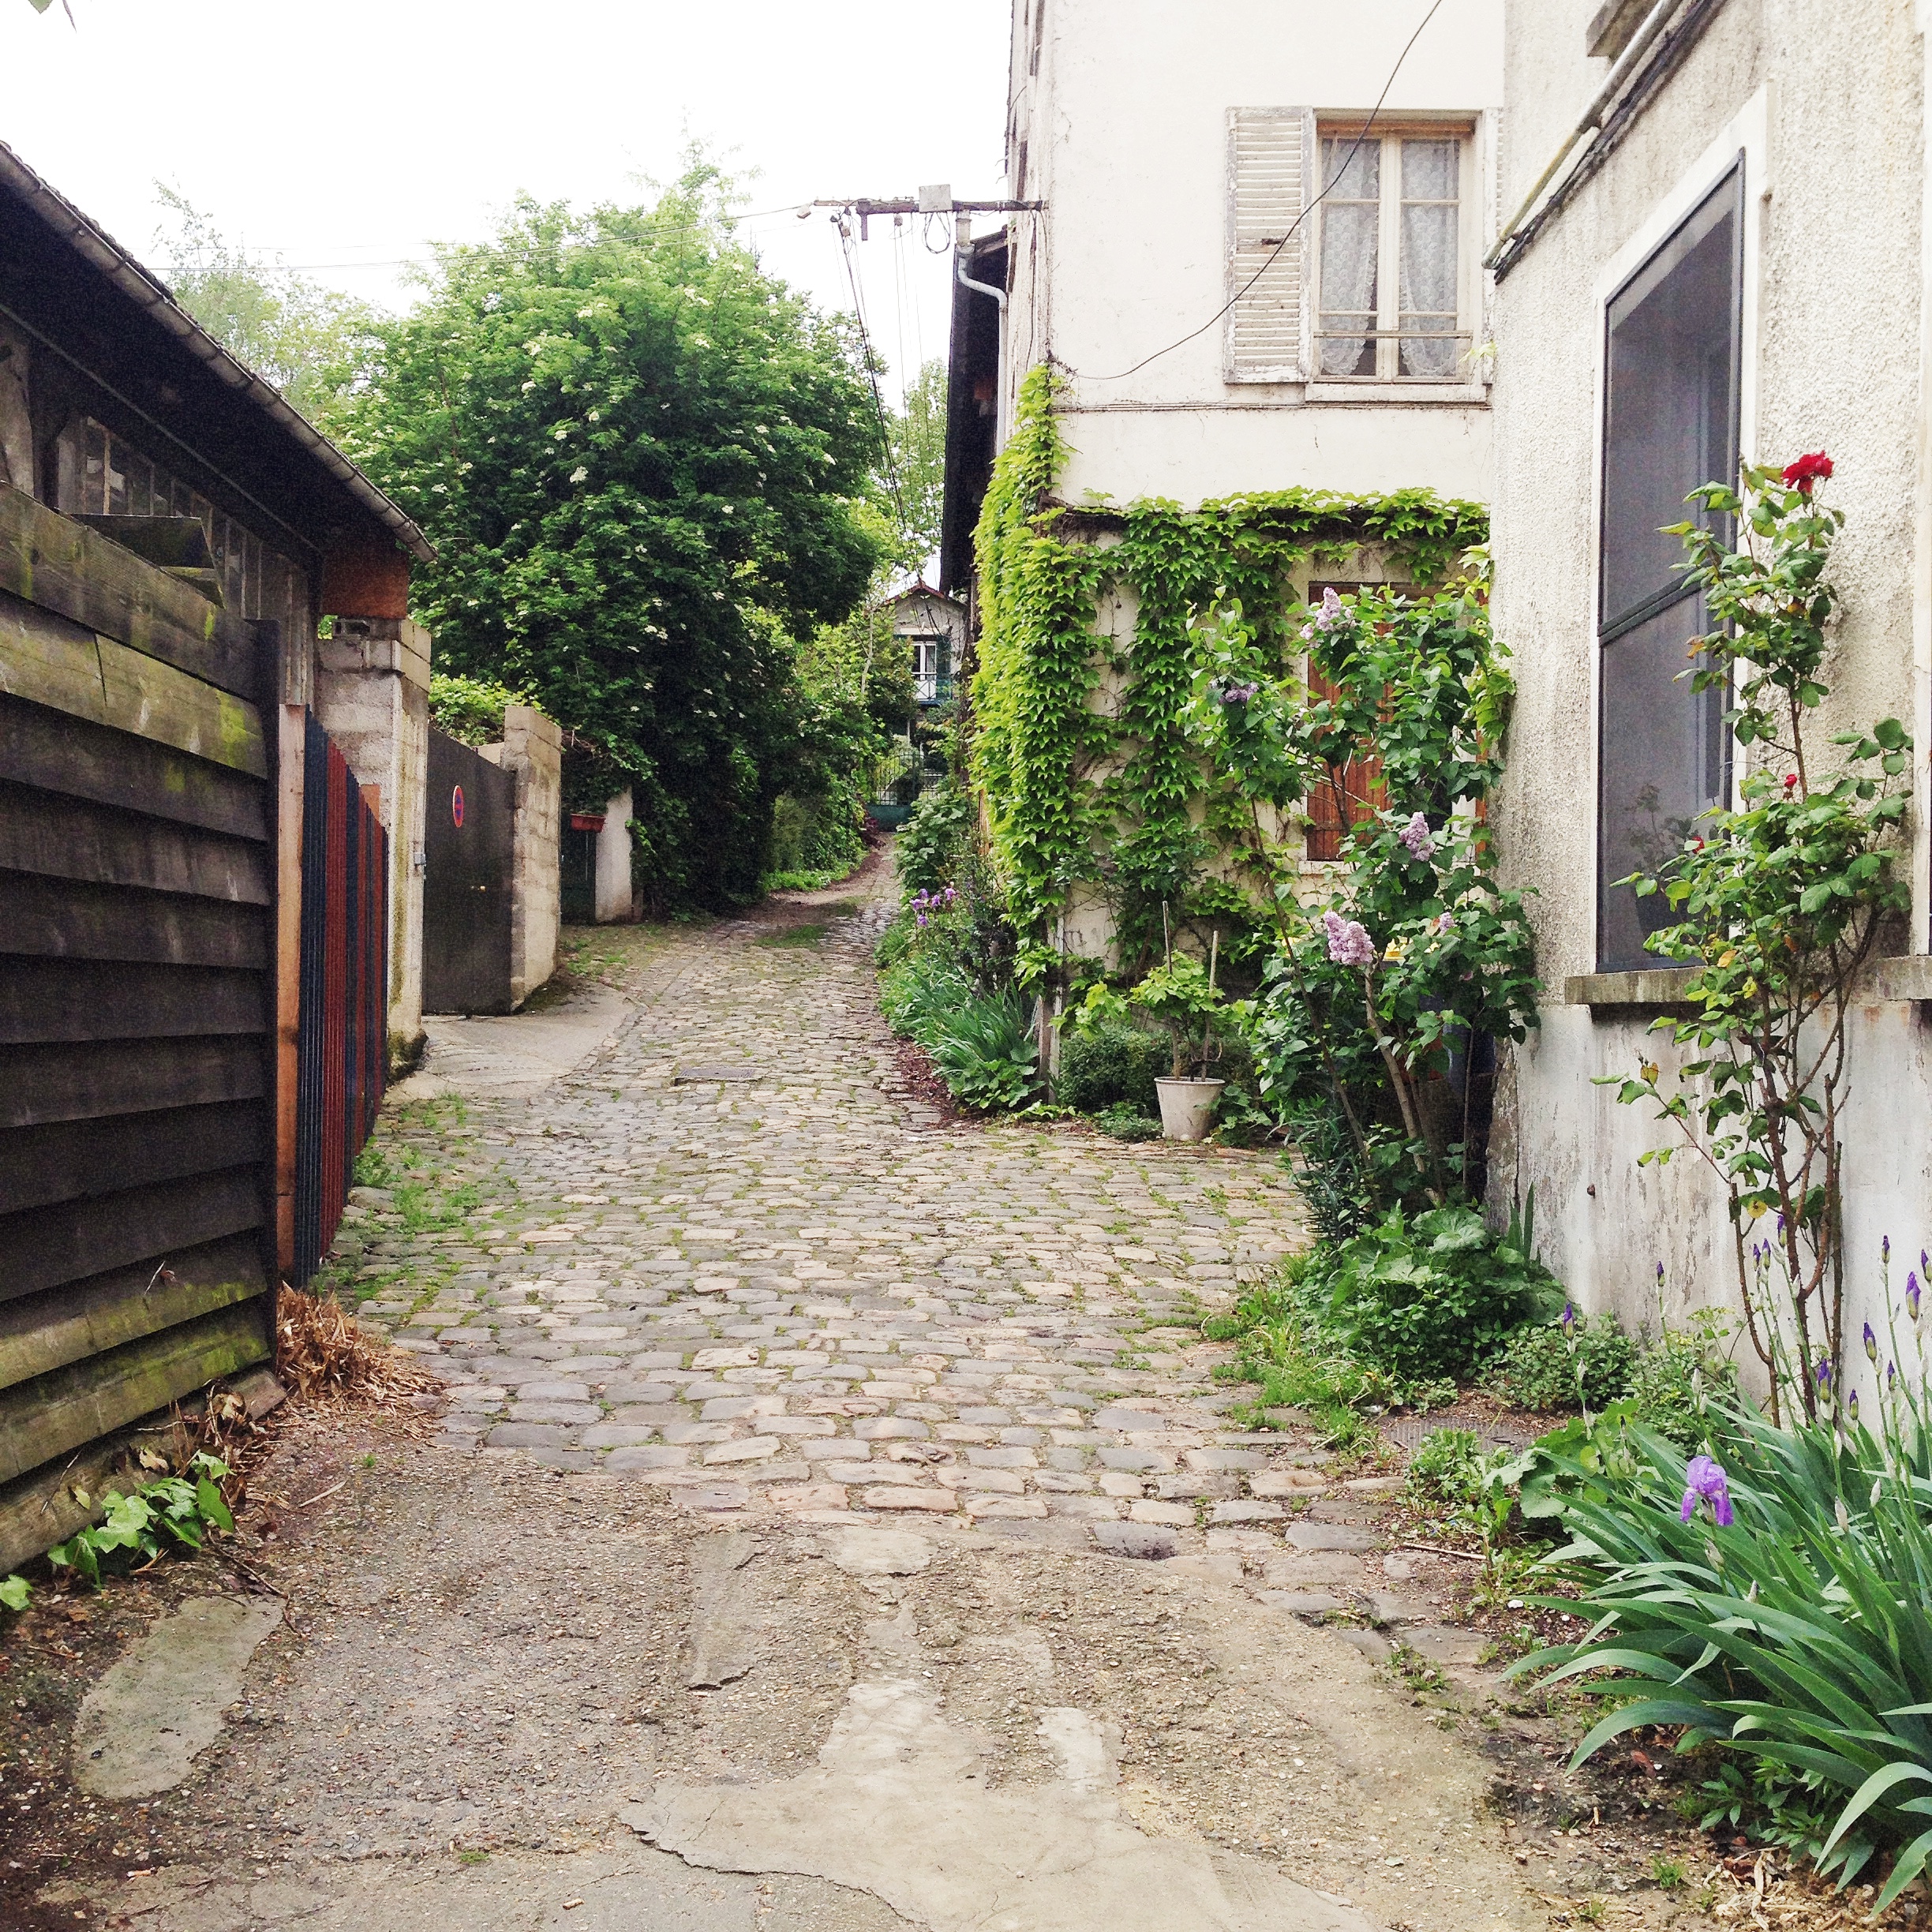
Composition is how you arrange/place the visual elements you’re photographing, within your frame. Essentially, it’s what you decide to include within your camera frame to tell your desired story. To me, that’s what photography is: telling stories with photos, whatever that story may be.
Next time you’re taking a photo, think about what you’re including in your frame. If it’s your kid’s soccer game try moving yourself so the background includes the soccer goal and not a garbage can, or if it’s a photo with your girlfriends while you’re out to coffee, include the coffee cups in the foreground to tell part of that coffee story.
4 Tips to Make Your Composition More Aesthetically Pleasing:
-
Keep your horizon line straight – I don’t want to feel like the subjects are falling out of the photos or that trees are growing sideways if they aren’t. Keep your photos true to life. This little trick also makes travel and sunset photos SO much better. The horizon is ALWAYS straight and buildings are mostly straight (although in Paris and Venice there are a hell of a lot of crooked sinking buildings which are fun to photograph too!). It’s only when you’re photographing the buildings straight on will you see that they really are crooked.


2. Don’t cut people off at joints – don’t cut your photos off at wrists or knees or other joints, it’s plain awkward and makes the subject look like they’re missing a limb. That also goes for the ends of things like fingertips, toes etc. Either include the whole foot or cut off mid-thigh. Cutting off mid-stomach is also OK.
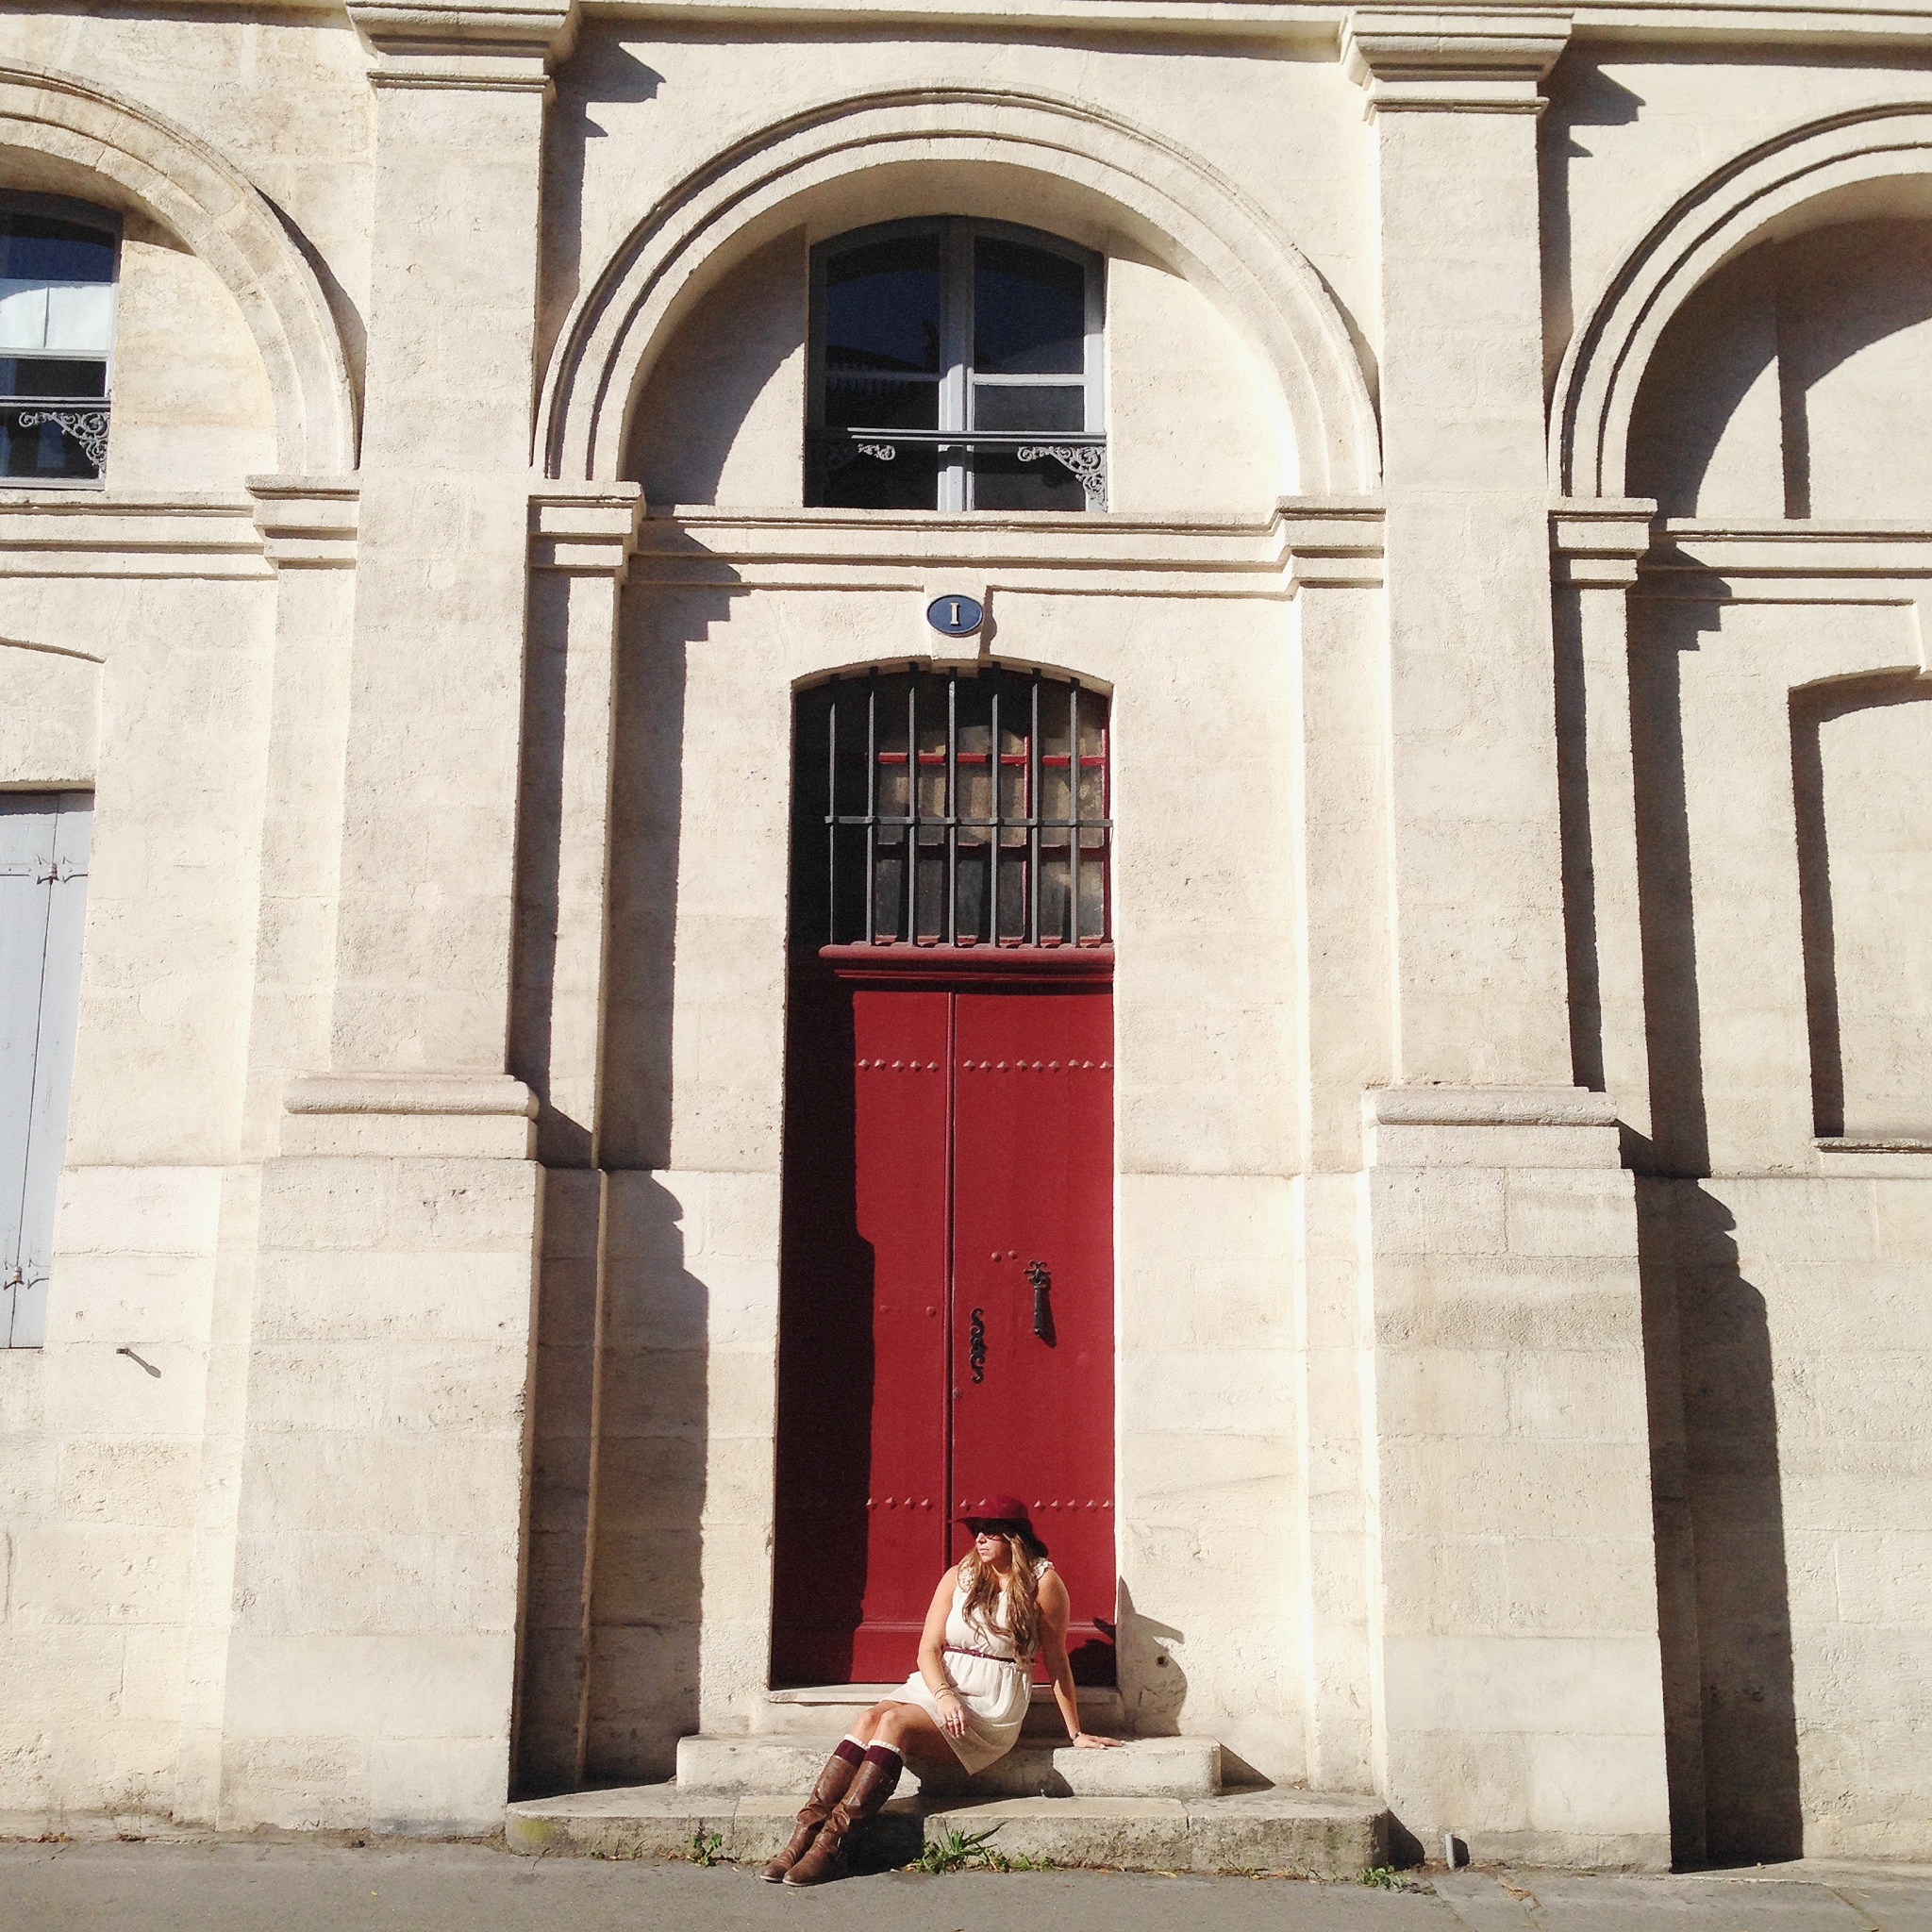
3. Fill your whole frame and be intentional with it. Even if it’s with sky, be sure to fill your frame with visually interesting things that help tell the story. If you’re struggling to include story-telling backgrounds, get closer — maybe you just need to focus on the person or the object rather than it’s surroundings.

4. Don’t zoom. Ever. Zooming on the iPhone looks terrible and brings down the quality of your photos. Instead, move YOURSELF when you’re photographing or use one of the different lens choices the phone provides. When you’re physically closer with your iPhone it also creates a more intimate look in the photographs. The viewer gets the feeling of an insiders point of view.


Perspective
Perspective changes everything. Literally and physically. Seeing something from the height of a toddler is not the same as seeing the same scene from the top of a Ferris wheel. If you want to show the world how your 3-year-old plays, get down on her level. If you want to show a bird’s eye view of the New Years Eve party in your backyard, head to the balcony or stand on a chair to be over people.
With each movement you make, your photos will change. If you go closer, the photo will be more intimate. If you are farther away, it’s more setting a scene.
YOU CHOOSE YOUR STORY.
Expert tip: Remember to look behind you, so much of the time, THAT is where the real story is and you’re missing it.


Lighting – The Lowdown
The iPhone camera is a bit precarious with lighting, especially if you have an older phone. I find that indirect and backlit photos are really hard to make with the iPhone as it gets all fuzzy and weird or makes the picture too bright in all the wrong places. This is why it’s important to have good light that’s bright enough.
Speaking of that, let’s take a little side road and talk about low-light and using flash. Repeat after me: PHONE FLASH STINKS.
Say it again.
And again.
And again, until people stop using it outside and stop giving their family evil red eyes.
At night and inside you’re better off finding ambient light for your subject than using flash. Ambient light means any light that’s already there without your flash. It can be light coming from a street sign, from a lamp post, from an iPad, from birthday candles, and anything else that emits light. This keeps in line with the idea of telling a story with your photos. Your iPhone flash is a temporary addition to a permanent story. It doesn’t belong.
Expert tip: In low light, make sure that your lens is clean and you’re holding your phone super steady to avoid any blur from your own hand and body movements. I like to take a breath before I take a photo so my body is firmly fixed and immobile.


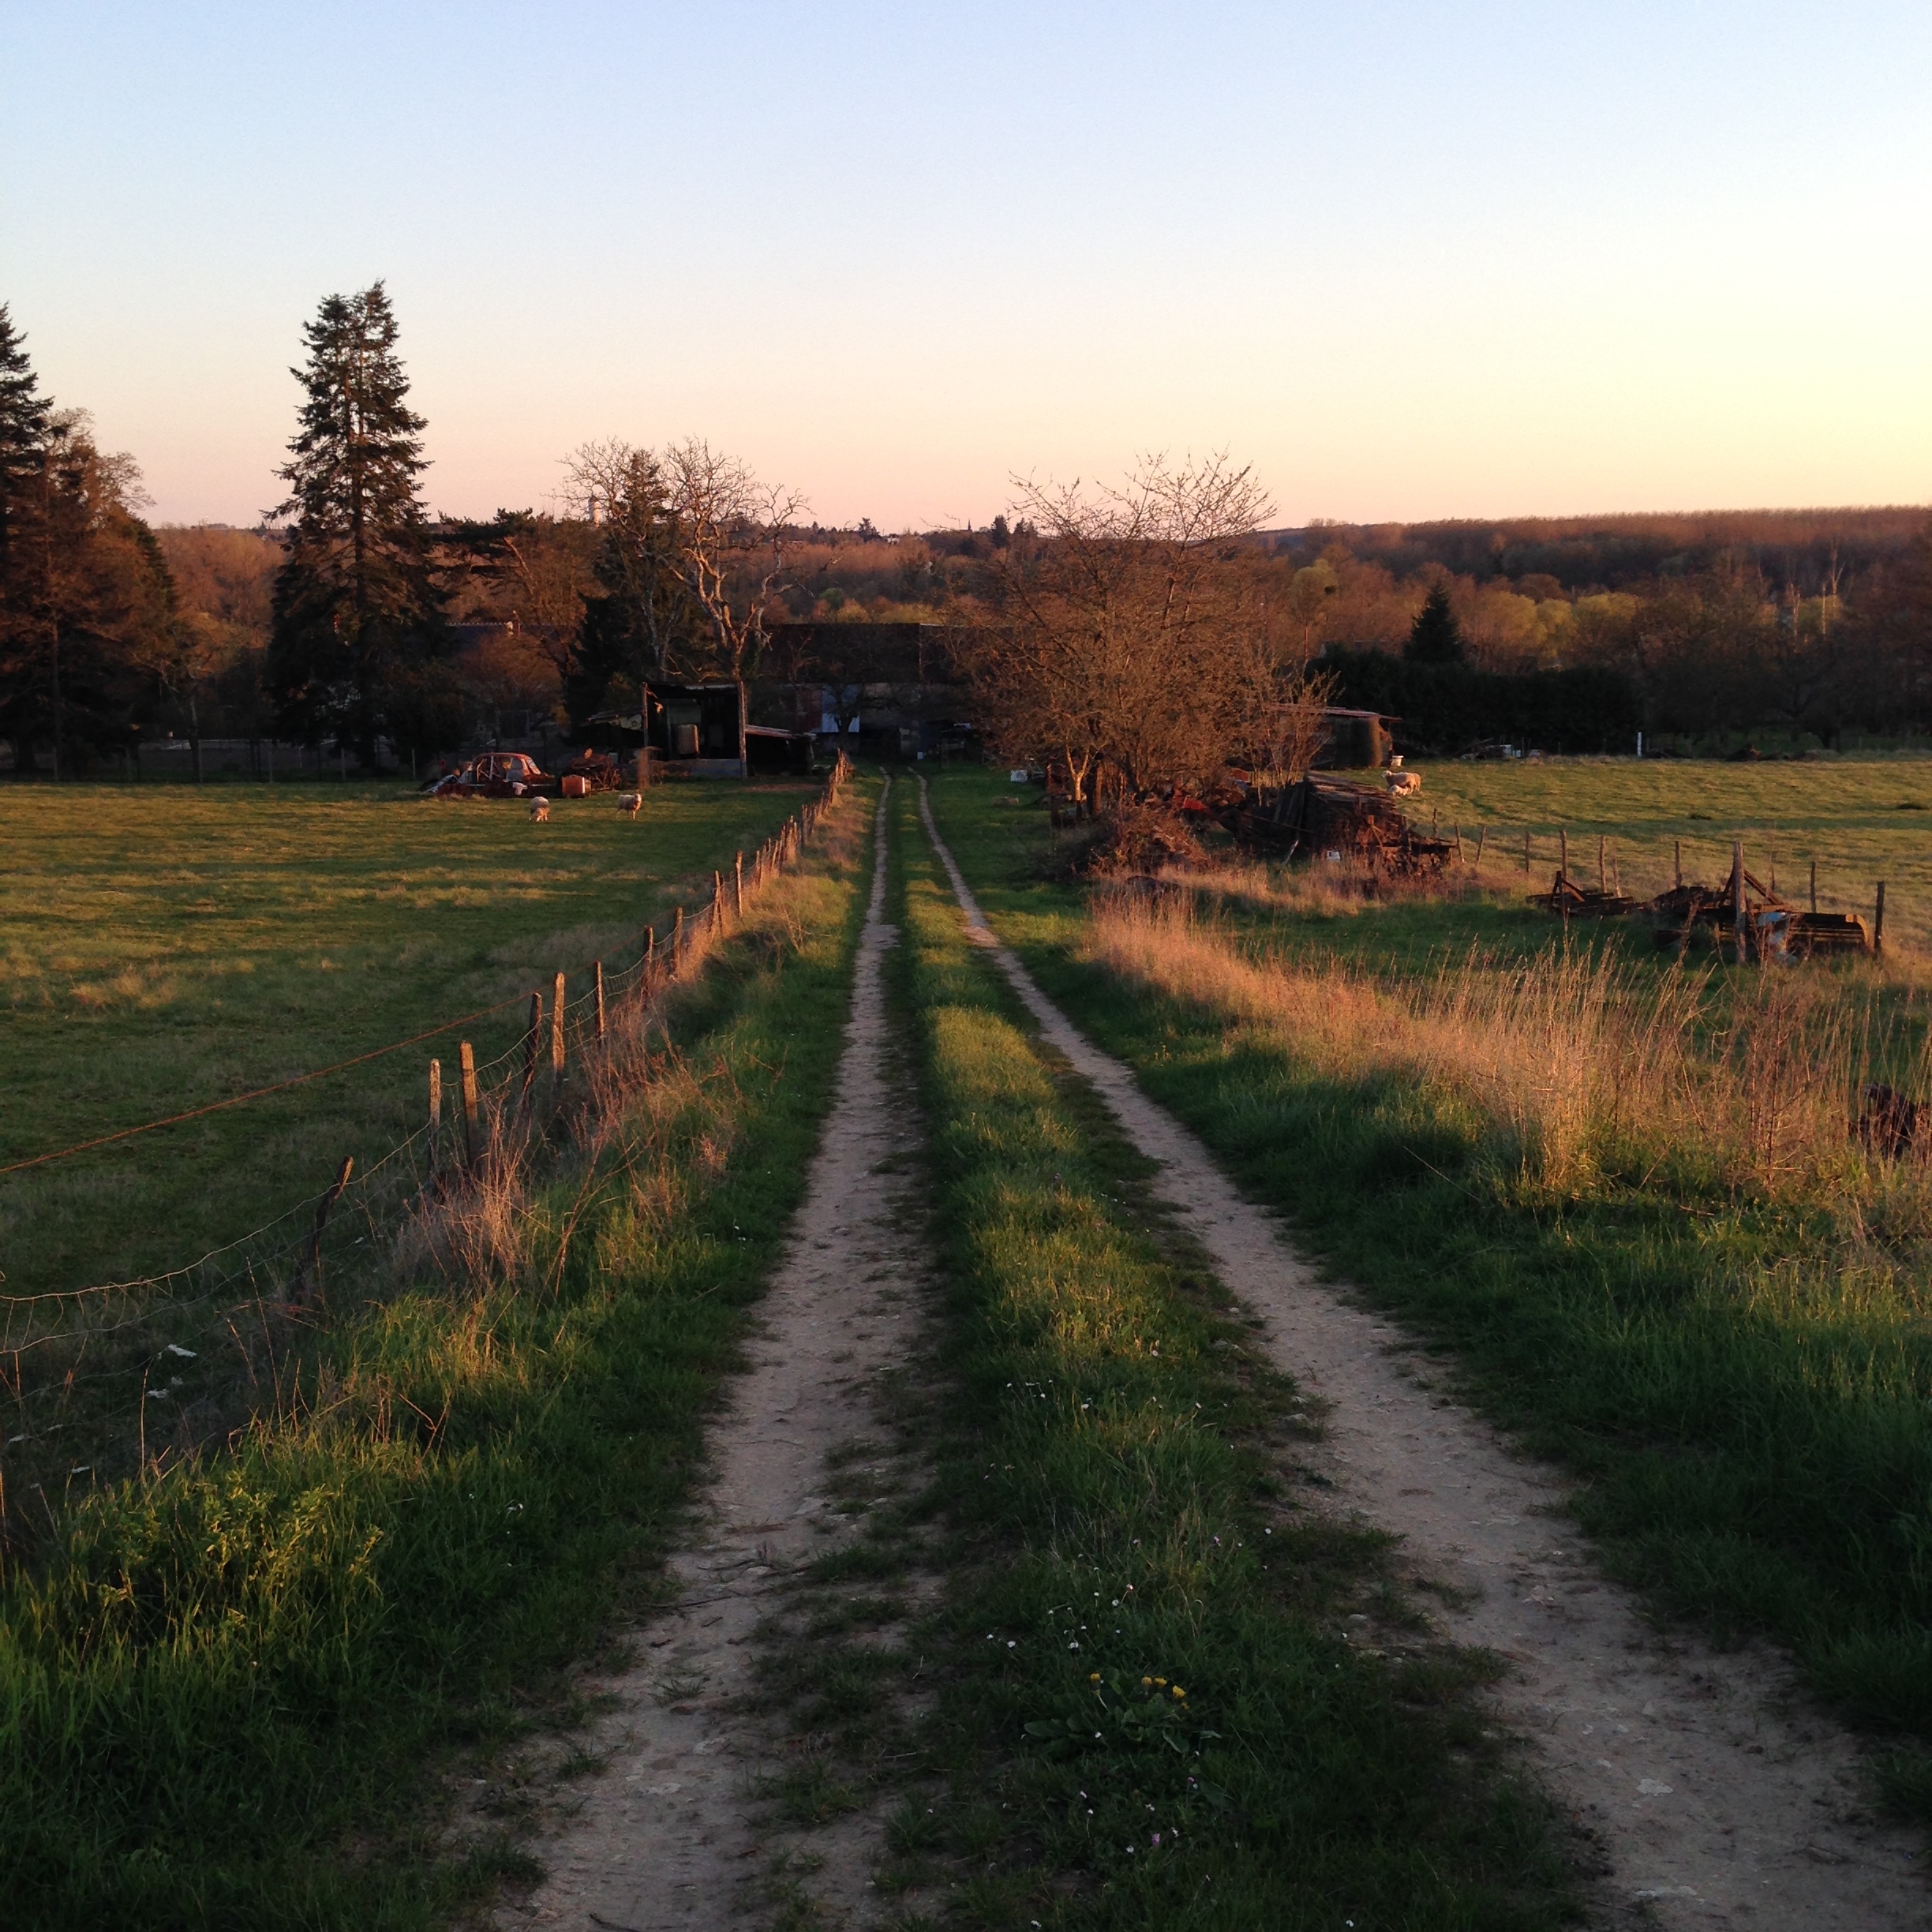
Lighting during the day is usually very easy. Having bright light in your photo that is directly hitting your subject will give you that clear, clean light that brings a photo from okay to WOW. The times of day that I LOVE shooting with my iPhone camera is anytime on a sunny day and during sunrise and sunset when you can get that soft yet contrasty GORGEOUS light straight out of an impressionist painting. I like to call it Degas light because he’s the king of showing that style of lighting in his paintings.
What can be really fun is using hard sunny light in your iPhone photos. You get deep contrasts and beautiful dark shadows that can add real story to your images!

MIDDAY

MIDDAY
SUNSET
iPhone Filters, Should You Use Them?
Short answer: No.
Long answer: No. Never ever use a filter that is going to change your photo BEFORE you take it. There are a number of built in iPhone camera filters (Mono, tonal, noir, fade, chrome, process, transfer, instant) and they all change the colors of your photos before you even take them. Keep your filter set on none and that if you want to put a filter on AFTER, you have the option.
A few months ago I was looking at my mom’s iPhone photos from her trip to visit me here in Paris and they all had this ugly brown hue over them. She didn’t even know! I was like, “Mom, yesterday was blue-skied but your photos look like it was hazy and brown. What gives?” Then I realized she had this awful filter stuck on her photos for the last 3 months. It’s not a huge deal but still, it’s a different memory than what actually happened and I feel like it’s a lie. There should be truthful color in photos (other than in your black and white photos, those will always ALWAYS be timeless).
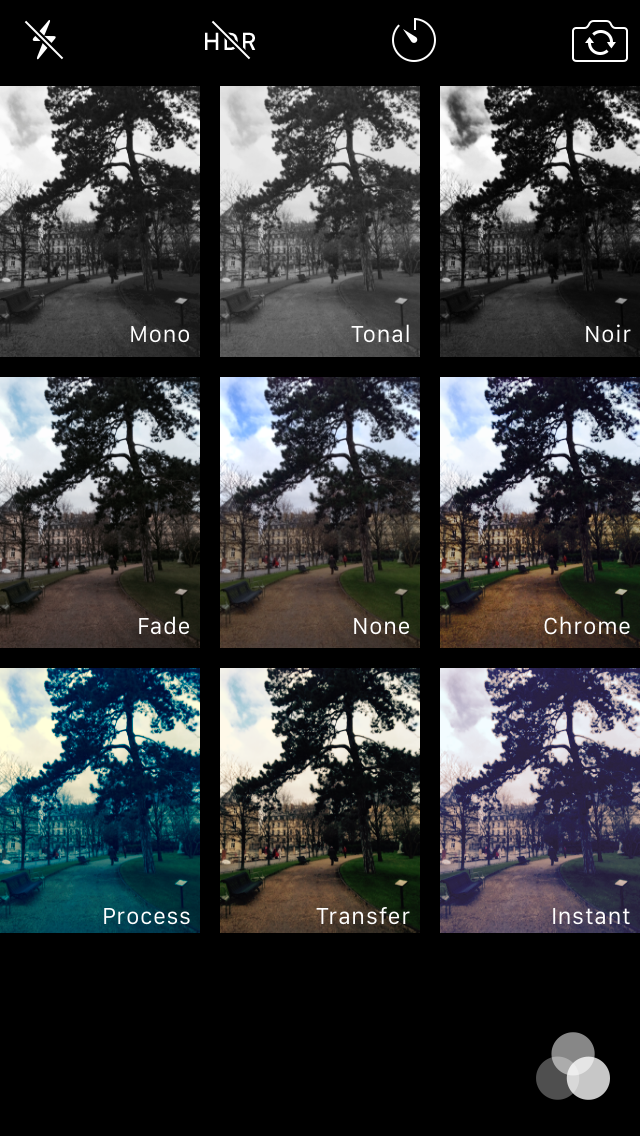
DON’T USE THESE!!!!!!!
Awesome!! Now it’s time to out and USE these tips, you can come back to this page at any point to refresh your memory.
Continue on to Session 3 HERE >>

